

Friday, October 14, 2016

Thursday, October 13, 2016
Paper Sweeties Planner Series

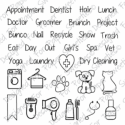
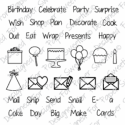
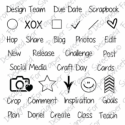
Hello my planner friends! Today I'm sharing my October Monthly spread for the Paper Sweeties Planner Series. For my side bar I decided to make a scarecrow and pumpkin. They are both from the Paper Sweeties Stand Add-on Scarecrow stamp set and Sweet Cuts dies. I filled in important dates using the Planner Series Appointment stamp set, Planner Series Celebrate stamp set, Planner Series Fall Sentiments and Planner Series Get Your Craft On stamp set. You can find the links below. I have two close up views of each page here so you can see them a little better. All the cute Halloween images and sentiments up on the top are from the Fall Sentiments.


To see the rest of the Design Team's projects you can follow the links below.
I used free printable stickers for my background, title, date covers and the special dates to note for the month. I found them at My Planner Envy. Did you know there was a National Day for tacos and candy corn, who knew. Thanks for stopping by today. Make sure to come back tomorrow for the first day of sneak peeks for the Paper Sweeties October 2016 Release. I know you're going to love the new goodies. They will be perfect for holiday projects.
 |  |  |  |  |

Friday, October 7, 2016
Cardz TV Sketch Challenge #2 Fall Theme


It's time for a new card sketch challenge at Cardz TV. Today the designers are featuring cards using Mary's sketches #3 or #4 and using a Fall theme. For my card today I chose to use Sketch #4 and turned it portrait style, then I used the Cardz TV Stamp set Fall Fun for my sentiment. I just love how this card turned out and think it's perfect for Fall. On a recent trip to Target, while checking out the dollar spot, I found a few paper pads for $3. I bought three paper pads and used this one for my card today. I just loved the orange and navy blue together.

To start my card I used a white cardstock A2 base card. I cut a solid navy blue mat to go under the plaid paper. Before attaching them to my card base I went around the edges with a navy blue ink to cover the white edges of the patterned paper. Next I cut my oval mats, using metal dies, in navy blue and an orange print. I was looking through my metal dies for an image and as soon was I saw this cute lamb from the Lawn Fawn Bah Humbug set I knew it was the image to use because of the cute little ball of yarn, knitting needles and cute knitted scarf and hat. I colored the images with Copics taking my colors from the plaid paper.
I stamped the sentiment on a smaller oval die cut with navy blue ink. I hope you'll join along in the challenge by linking your card over on the Cardz TV blog. You'll have a chance to win a set of Cardz TV stamps.
Sunday, October 2, 2016
The Cutting Cafe Halloween Milk Carton

It's time for the first Cutting Cafe Design Team project of the month. Today the team is highlighting projects made with the Halloween Treat Cups or the Halloween Milk Carton. The Milk Carton is one of my all time favorite Cutting Cafe files. Today I dressed up my carton with a cute Mikela Ann Being A Good Witch image. I paper-pieced her outfit, giving her a nice sparkly hat. I finished it off with an orange tulle bow and a tiny tag using a sentiment from the Halloween Mini Words printable.
Saturday, October 1, 2016
Paper Sweeties October 2016 Inspiration Challenge

Happy October, my crafty friends! It's the first of the month and that means it's time for a new inspiration challenge at Paper Sweeties using the photo below.

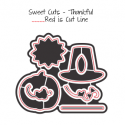
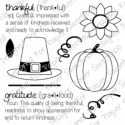
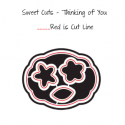
I took my inspiration from the pretty fall colors and the white pumpkins. After several attempts to take a better photo of my card I decided that the sparkly paper I used for my pumpkins wasn't going to show up well in a picture. I used some glitter paper from DCWV. My scarecrow, wheat, hay bale and small pumpkins all came from the Stand Add-On Scarecrow stamp set and Sweet Cuts and the large pumpkin came from last month's Thankful release, as well as my sentiment. I stamped the sentiment on the label from the Thinking of You Sweet Cuts. I made a shadow cut for my sentiment by placing the die on my green paper and tracing around the outside edge of the die. This is a great tip if you want a shadow around any of your die cuts. I hope you'll play along with us this month. You can link up your creation on the Paper Sweeties blog. You can check out the rest of the Design Team projects by clicking on the links in the list below. Thanks for stopping by today.
 |  |  | | |
Friday, September 23, 2016
Cardz TV Sketch Challenge Birthday

I'm so excited! Today is the debut of Cardz TV Stamps Sketch Challenge. So excited to be on the Design Team for Sketches. If you haven't used any of Mary's Card Sketches you can find them on the Cardz TV blog HERE. I'll have a photo of the sketch I used and you can see all the dimensions at the bottom of this post. If you go to the Cardz TV Stamps blog you can download the sketches for yourself. I printed all the sketches out and then cut them down to fit into an inexpensive photo album I purchased at Michael's for $1. It's a great shortcut when you need a quick card and just can't come up with a design in your head. The sketches have all the dimensions for each cut you'll need to put the card together.
Today I'm showcasing the card I made using Mary's Sketch #2, Cardz TV Stamps Lucky Dog stamp set and Cardz TV Stamps Critter Punnies. My patterned papers are an older DCWV paper stack called The Pet's Stack. I usually cut all the cardstock pieces out before doing anything else. Another good idea is to pre-cut pieces and stick them into an envelope and just have them on hand for when you need a card. When an occasion comes up you can just grab a pre-cut kit and decide on the image and sentiments you want to add. I started off by stamping the dog in Momento Rich Cocoa ink on off white cardstock then fussy cutting him and placed him on a piece of paper with bones on it. Then I stamped the sentiment and two paw prints on the sentiment strip and assembled the card front. I wanted to have a fun little scene on the inside of the card, too. I stamped the dog house from the Lucky Dog stamp set, the bone from the stamp set and a sentiment from Critter Punnies, again using the Rich Cocoa ink but this time I stamped on white cardstock. I did a little coloring on the dog house with Copic markers and stamped the sentiment into the door. For the bone I just inked the edges of the stamp and after cutting it out I added a layer of Glossy Accents. To finish off the inside I stamped the birthday sentiment. These Sketch Challenges will be on the Cardz TV blog every other week. You can link up a project of your own for the chance to win Cardz TV stamps over on Mary's blog using InLinkz at the bottom of the blog post for the Sketch Challenge. Thanks so much for visiting today. I appreciate you stopping by and the comments you leave.


Monday, September 19, 2016
Let's Write A Letter

I have a really FUN Cutting Cafe set to share with you today. It's called Let's Write A Letter. Do you even remember what it's like to really write a letter? You know, where you sit down with pen and paper and put your thoughts and words down. With the obsession to use the internet for emails, Facebook, Twitter, Pinterest, Instagram-no one writes a good old-fashioned letter and mails it through the post office. Regina has a solution for that with her print and cut file Let's Write A Letter. This file comes with the following:
Two different styles of boxes to hold your stationery
17 Stationery Sheets (colored patterns and black & white patterns
Four assorted tabbed separator sheets
Eight sentiments
Envelope Template
A sheet with suggestions on how to write a letter
The printables come in PDF, SVG, MTC and WPC formats.
As soon as I saw this set I knew I was going to make it for my granddaughter, Payton, who is in the 5th grade this year. We live in Florida and Payton lives far away in Michigan, so we don't get to see each other often. Even though we are far apart we are close in our hearts. I think she is at the perfect age for both writing and appreciating a letter from her Nana. I decided to use the folder type box for my stationery set. I wanted the set to have a fun feel to it so I added a couple critters on the front of the box. My paper is from a really old DCWV paper stack called The Green Stack, made with recycled paper.


You'll want to be sure and catch the rest of the Design Team's projects using this set and you can find them on The Cutting Cafe Blog post September 21st. Thanks for stopping by today and I challenge you to write a letter to someone in your life.
Subscribe to:
Posts (Atom)