Friday, May 20, 2016

The Cutting Cafe 3 Tier Box


I can't go on with any part of this post without apologizing for my awful photo. No matter what position I clicked from I just could not get a decent photo. The picture doesn't do this Cutting Cafe 3-Tiered Box any justice at all.

So today the Cutting Cafe Design Team is using the 3-Tiered Cake Box Template and Cutting File. I will tell you that I had to alter my box sizes slightly for my purpose because I had specific items to go in the boxes, as I made this to give my daughter for her wedding. Today, April 21st, hubby and I are attending our daughter's wedding in Michigan. For us Floridians, can I just say it's awfully darn cold here. I left 90 degrees and arrived to 45 degrees. Shocking to my system, to say the least. What possessed her to choose a location at the farthest northern spot of the lower peninsula, I'll never know. It was her decision to make anyway, so no matter where she chose we would be there.

Anyway, back to my design. I used K & Company papers for the box. I used the SVG file and my Cricut Explore to cut all my pieces. As a side note, I first cut a prototype from white cardstock to get my sizes all right. If you have really good paper that you are planning to use, I would suggest you do the same, just in case anything goes wrong. I was so glad I did this because I did make a mistake along the way. If I had used the pretty paper first I would have ruined it and I didn't have anymore. After cutting all the pieces and assembling the boxes I did some simple embellishment of each "layer" by adding lace along the top edge. I didn't want to cover too much of the gorgeous paper on the top so I die cut a felt rose and a couple leaves and added them off to the side so the prettiest part of the paper could still be seen. I know you'll want to see the rest of the Design Team's creations using this awesome box so check out The Cutting Cafe Blog. Oh, I forgot to mention this cutting file also comes with a box to put the cake in for presentation. I forgot to take a photo of mine before I packed it to take on the trip. So sorry, but you can see the awesome cake and box Regina made HERE on The Cutting Cafe website.

Monday, May 16, 2016

Paper Sweeties May Release Rewind


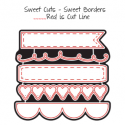
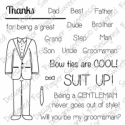
It's the last day of inspiration for this month's Paper Sweeties Release. This month's release is the Best Dad stamp set, the Sweet Borders Stamps and Sweet Cuts and the Planner Series release Checklist. You can find them all available now at the Paper Sweeties Shop. For my card today I used the Sweet Borders Sweet Cuts to make the banners across the front of the card. I punched some circles and added letter stickers to spell out the word Happy. Next I stamped and heat embossed the word birthday (from the Planner Series Celebration stamp set) onto a hand cut banner and added some dimensional foam adhesive to the back to pop it off the card. Follow the list below to see the final release posts from the rest of the Design Team. Thanks for stopping by and if you are ready to purchase this month's release head over to the Paper Sweeties Shop.

Debbie Marcinkiewicz – Paper Sweeties
Jeri Thomas 
Jill Norwood
Jinny Newlin - *May Guest Designer* 


Sunday, May 15, 2016

Paper Sweeties May Release


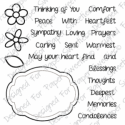
Yay, it's Release Day at Paper Sweeties. Today I've made a Father's Day card using the new Best Dad stamp set and the Planner Series Checklist stamp set. See those two little sweetie boys holding their signs for daddy. I have two darling grandsons that are a little too young to get a card for their daddy, so I made this card for them to give him on Father's Day. I used patterned papers from the Lawn Fawn Sweater Weather 6x6 paper stack. After I assembled the card base with a small brown print and the argyle border on each side, I stamped (with Momento Rich Cocoa ink) and die cut a label from the Think of You stamp and Sweet Cuts. I wanted a background for the two little guys to sit on. I stamped the boys and colored them with Copics then added the sentiments their holding from the Best Dad stamp set and fussy cut them. To finish the card off I heat embossed the sentiment from the Best Dad stamp set. You can head over to the Paper Sweeties Shop to purchase today's release. For more inspiration hop to the rest of the Design Team using the list below.


Debbie Marcinkiewicz – Paper Sweeties
Jeri Thomas 
Jill Norwood
Jinny Newlin - *May Guest Designer* 


Saturday, May 14, 2016

Paper Sweeties May Release Sneak Peek


I'm so excited that the day has finally arrived to share sneak peeks for Paper Sweeties May release. This month's releases are titled Sweet Borders and Sweet Borders Sweet Cuts, Best Dad and Planner Series Checklist. I've used one of the Sweet Borders to make my card today. This is a very exciting month for our family as we have a daughter getting married. We're very much looking forward to the weekend festivities and having the opportunity to reunite with our family. Now that we live in Florida we don't get nearly enough time with family because all five of our kids live in different states. Knowing that I needed to make a wedding card for my daughter was all the inspiration I needed to get started on this card. I've always loved a white on white look so I started with a white cardstock base and added a mat that I embossed with the Cuttlebug Swiss Dots embossing folder. Next I die cut the beautiful lacy heart border seven times. I started at the top with just the heart strip showing the embossing through the center of the heart, then added the next strip and left the center hearts in the strips and continued on down the card. In the very middle of the card I decided to add a little touch of color with a pink heart. I inked it with Tim Holtz distress ink in Victorian Velvet. For a finishing touch I added the love sentiment which came from last month's Hello Spring release. I know you'll want to see the rest of the Design Team's inspiration for this month's release so you can follow the link's in the list below. Make sure you come back tomorrow for some more inspiration and you'll be able to purchase the new sets in the Paper Sweet Shop.

Debbie Marcinkiewicz – Paper Sweeties
Jeri Thomas 
Jill Norwood
Jinny Newlin - *May Guest Designer* 


Friday, May 13, 2016

Cardz TV Stamps It's Your Birthday Blog Hop


Hello Cardz TV Friends! Welcome to the Cardz TV Stamps It's Your Birthday Blog Hop. You should have arrived here from Mary's Cardz TV blog. I am the second stop on the hop. I'm very excited that I will be able to present this birthday card to my friend in person. It has been almost two years since I've seen her after moving to Florida. As you read this we are traveling to Michigan for our daughter's wedding. After the wedding we will be stopping to visit our friends who were our neighbors at the campground where we spent our summers. Lucky for me, the stop coincides with her birthday. (Hope she doesn't see this post before our visit).

To put this card together I used one of Mary's card sketches (#4). You can find all of Mary's sketches on her blog under the tab Mary's Card Sketches. I started with a white A2 size base card then added the two mats, one a red polka dot and the other is from the Echo Park 6x6 Happy Summer paper stack. I loved the cute little birds on the paper. To continue with the bird theme I die cut my bird using the Simon Says Stamp Bird of Roses die. Before I die cut it I added a piece of fun foam with Stick It adhesive to the patterned paper to give it a little dimension. I added the bird to a die cut oval that I embossed using the Cuttlebug Retro Kitchen embossing folder. I added the embossed oval to a green polka dot oval. For my sentiment I used the Cardz TV stamp set "Just Saying". I cut the stamp apart so I could get it on one line  and stamped it onto a die cut fish tail banner using Momento Tuxedo Black ink. On the inside of the card I added the sentiment Happy Birthday from the Cardz TV Stamps "Bigger Everyday Sayings".


Please continue on with the blog hop. Your next stop is Gloria. In case you get lost along the way here is the entire blog hop list. Thanks for coming by.

BLOG HOP LINE UP:

Paper Sweeties Planner Series May Release


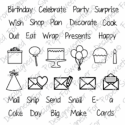
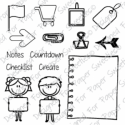
Hello, Paper Sweeties Friends! Today is the day we sneak peek this month's release starting with the Planner Series. This month's Planner Series release is called Checklist. I used the new release for the cutie patootie bride and groom marking my daughter's wedding this month on the 21st. In fact, as you read this, hubby and I are on the road traveling to Michigan for the wedding. After month's away from our family it will be a grand reunion and a wonderful celebration. For this monthly spread I also used the Planner Series Celebration set to highlight family birthdays, the Planner Series Get Your Craft On, Paper Sweeties Upper and Lower case Alphabets, and Happy Fall Ya'll. The Checklist planner stamps have these adorable kids (boy & girl) holding signs in their hands. To make my bride and groom I stamped the kids, colored them with Copics, then used the Alphas to add the words Bride and Groom to their signs. For the bride I drew a simple dress piece to add to the girl. On my side bar I added a couple clouds and the kite from the Happy Fall Ya'll stamp set. For this month's birthdays I stamped the party hat around the dates then added banners and stamped the word birthday from the Celebration set. You can see the rest of the team's planner posts by following the links below. Make sure to return tomorrow for another May Release Sneak Peek.

Debbie Marcinkiewicz – Paper Sweeties
Jeri Thomas


Thursday, May 5, 2016

The Cutting Cafe Mixed Shapes Album


It's time for my first monthly post for The Cutting Cafe and this week the Design Team is making projects using any of Regina's albums including the word shaped albums. I chose to use the Mixed Shapes Album and I'm getting a head start on Christmas. Yay, for me! (Patting myself on the back). I participate in a Secret Santa gift swap for Christmas and I received a fabulous package of Doodlebug Christmas goodies including paper, embellishments, adhesive die cuts, journaling cards and stickers. They were just perfect for this project. I started by using my Cricut Explore to cut the album pieces from heavy chipboard and then chose the printed papers for each page and cut them out of the Doodlebug papers. I attached the paper onto the chipboard with a strong adhesive. Then I simply took embellishments, die cuts, journaling cards and stickers to decorate each page. On a few of the pages I cut frames to insert pictures of the season.


I used rings to hold the album together and attached pieces of ribbon and lace to the rings for decoration. Thanks for coming by today and make sure you head over to The Cutting Cafe Blog on May 7th to see projects from the rest of the Design Team. I know you'll be inspired.

Sunday, May 1, 2016

Paper Sweeties May 2016 Inspiration Challenge


Hello Friends! Wow, I can not believe it is May. It's time for another Paper Sweeties Inspiration challenge. Beautiful colors this month. Anytime pink is involved I love it. Here is the photo:


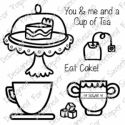
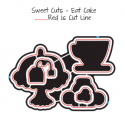
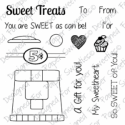
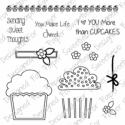
For my card this month I used the Paper Sweeties Eat Cake stamps and Sweet Cuts on my card, as well as the Sending Sweet Thoughts set and there's a little sneak going on here of a few items that will be in this month's new release coming on May 15th (sneak peeks starting on May 12th). I am recently falling in love, again, with vellum. I used it to cut the cake plate from the Eat Cake set, then I colored it pink by rubbing a pink dye ink stamp pad over it. I also cut the cupcake liner paper from it. As you can see from my photo I fussy cut the cake plate and did a little strategic cutting to remove the top of it so I could place my cupcake on it. My sentiment is from the Sweet Treats Snow Globe Add-on set. Thanks for stopping by today and Happy May. You can see the rest of the Design Team's projects by following the links below. Don't forget to come back for the Paper Sweeties Planner Series post on May 12th and sneak peeks for this month's release starting on May 13th.