Sunday, November 20, 2016

The Cutting Cafe Anything Goes


It's time for my second Cutting Cafe post for the month. I love when we get to choose any file for our projects. I've been working on little token holiday gifts for friends and this is one of them. I used the Hot Chocolate Holder Template and Cutting File along with the Christmas All Around Printable Set for my cute Snowman tag. These Holders are so quick and easy to put together you can easily whip them up in minutes, slip in a couple envelopes of hot cocoa mix, add a ribbon and tag and there you have it. These make great hostess gifts or even a little something for a teacher. Head on over to The Cutting Cafe Blog to see what the rest of the Design Team came up with for their projects. Thanks for stopping by.


Friday, November 18, 2016

Cardz TV Sketch Challenge Thanksgiving


It's time for a new Sketch Challenge at Cardz TV. This week the Design Team is using Sketch #5 or Sketch #6. I decided to use #6 because I wanted to use this cute turkey image from Pink & Main and knew it would look best in a circle. I also wanted to use this awesome paper from a paper stack I found in the Target dollar section. It has these beautiful copper embossed papers in it and I fell in LOVE. Have you ever stamped and colored on kraft cardstock? I'm really fond of the look. I used colored pencils for this. So I started with a kraft cardstock base card then added a copper mat and topped it with the pretty copper leaf paper. Then I die cut a copper circle and topped it with my image on a smaller die cut circle. For my sentiment I used Cardz TV Thankful For You stamp set. I cut apart the "Gobble 'til you Wobble" sentiment so I had just the word Gobble, because obviously, my turkey needed to Gobble. I hope you'll play along in the challenge and link up your project at Cardz TV. You can find all of Mary's Sketches on the Cardz TV blog.

Wednesday, November 16, 2016

Paper Sweeties November 2016 Release Rewind


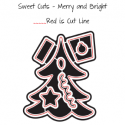
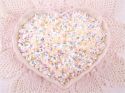
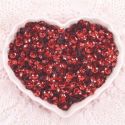
It's the final day of projects featuring the November Paper Sweeties release. Today I have a shaker card to share. When I saw all the sweet images from the Planner Series Happy Holidays stamp set I knew I wanted to fussy cut the images and add them to a shaker. For my shaker "window" I decided to cut out the Christmas tree shape using the Paper Sweeties Christmas Tree Tag Sweet Cuts. I cut the tree shape out of some green patterned paper then cut the stand, garland and star from white glitter paper. I filled my shaker with lots of sequin bits including Paper Sweeties Mistletoe, Sugar Sprinkles and Strawberry sequins. Then, of course, the red stamped, fussy cut images from the Happy Holidays Planner stamps. I wanted to make sure that they didn't all sink to the bottom of the card so I glued them in place, as well as some of the sequins. Please check out the projects from the rest of the design team using the links below. All this month's products are available in the Paper Sweeties Shop now HERE.


Tuesday, November 15, 2016

Paper Sweeties November 2016 Release Party


Welcome to Paper Sweeties Release Day! Oh my, I am just absolutely loving this adorable Jingle All the Way stamp set and Sweet Cuts. That reindeer is just too cute! I decided he had to go on a snowy scene card. I paper pieced the sleigh that he's pulling and colored him up with Copics. Of course, he had to have a little red nose. I embellished with a red twine bow, jingle bell and a gold sequin for the top of the tree. I added the sentiment stamped in red to finish it off. Catch the rest of the Design Team projects at the links below. Thanks for stopping by and come back tomorrow for a final new release project.


Monday, November 14, 2016

Paper Sweeties November 2016 Release Sneak Peek


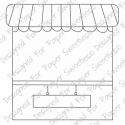
Welcome to the first day of projects for the November Paper Sweeties release. You're going to love this month's products. Today I'm starting with a card using the new set Stand Add-on Sweet Treats and a couple of stamps from the new Planner Series stamp set Happy Holidays. Hopefully, it looks like a cute little bakery window with a display of holiday treats. (That's the look I was going for, anyway). I did a lot of paper piecing on this card. I stamped the stand on a cute scrap of holiday paper from my stash. I thought the cookie shapes were perfect for the base of the stand. Another scrap for the window valance. Next I stamped and die cut the roof and added a cute little wreath to the center. The wreath came from the new planner stamp set. A couple of sweet tiered cakes and two little gingerbread men decorate the front window of my bakery. In this set the Sweet Treats sentiment is stacked, but I cut it apart to stamp it across the sign for the shop.

Now I know you're going to want to see the rest of the Design Team projects. You can click on the names below to visit their blogs.


Make sure to visit again tomorrow for another project using this month's new release. I just love the set I'm using for my card tomorrow. Cute as can be!


Sunday, November 13, 2016

Paper Sweeties Planner Series November


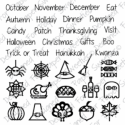
I'm so excited to share my December Monthly Planner pages with you today. This month's Planner Series release is so adorable. It's called Planner Series Happy Holidays and it has the best holiday images. I think the teeny tiny gingerbread man is my favorite. I decided to do my pages in a traditional red and green color scheme. It's fun that this month's first day is on Thursday so that allowed for a cute little Christmas scene at the top of the page using some of this month's new releases. I decided to use the Christmas lights from last month's Basket Add-on release. I trimmed them down to be a single row of lights and strung them across both pages. This month I decided to stamp the images on cardstock and fussy cut them to make them literally pop off the page. A couple close up photos for a closer look.


I can hardly believe that this is my last monthly spread of the year. The year just flew by and it's time for a new planner. There are so many fabulous planners out for the new year. I'm having a hard time deciding which one to get. You can follow the links below to see the rest of the Design Team's planner projects.


Friday, November 4, 2016

Cardz TV Sketch Challenge #4 Thank You Theme


Welcome! So glad you're here to join me today for another Cardz TV sketch challenge. This time around the Design Team is using Sketch #9 or #10 and using a Thank You theme.  I decided to use Sketch #10 and used the Cardz TV Stamp set Big and Bold Sentiments. I wanted to make an elegant looking card this time around so I decided to add some touches of gold. I did that by inking around all my mats with some Delicata Golden Glitz ink and heat embossed my sentiment on vellum using WOW Embossing Glitter in Golden Sunrise. I don't really think my photo does this card justice. The touches of gold are just gorgeous in person. That Delicata ink is another supply that I have been hoarding. I found it while participating in an annual Scrapbook Store Shop Hop in the spring. This is the first time I have used it as it is a little pricey. I was lucky enough to find a special set with smaller ink cubes in four colors, the other colors are Silvery Shimmer, Bronze Burst and Celestial Copper. I thought this gave me a little more bang for my buck. (Also takes up less storage space in my tiny home). The papers I used on this card came from a very old stack made by Cloud9Design. Honestly, I'm not even sure that company is around anymore. I decided to add a pretty fall leaf popped with some foam tape in the middle of that center circle to draw the eye in. I love how this card turned out and I'm going to pop it in the mail for a friend back in Michigan. Just so she knows that I haven't forgotten about the beautiful fall colors I left behind when we moved to Florida. I hope you'll play along with the challenge. You can find the sketches and link your creation over at the Cardz TV blog HERE. Thanks for stopping by. I always appreciate your visit and your comments.

Sketch #10


Thursday, November 3, 2016

The Cutting Cafe Mini Scalloped Gable Boxes


If you like to give small holiday gifts to friends or neighbors I have the perfect little boxes. I am so in love with these Cutting Cafe Mini Gable Boxes from the Gable Box Template and Cutting File. I put some cute little die cut bows on these so the scallop on the top of the boxes don't show up, but they are so cute. I used the SVG file and my Cricut Explore Air to cut these, but the Cutting Cafe files also come in a PDF, MTC and WPC formats. Because I tend to be lazy when it comes to my cutting machine, I imported the file to my Cricut and cut them one at a time instead of taking the time to copy and paste another one onto my mat. I just flipped the mat around and loaded it into my machine to cut on the other half of the paper.


There are so many options for what you could put into these little boxes. They are the perfect size for some little pocket hand sanitizer or chocolates. I always make some sort of little holiday gifts to give our friends and I usually put candy in them. Over the past few years my homemade Christmas cookie trays have become quite the hit at holiday gatherings so I decided to give out some fudge this year. For my cute little tags I used the Cutting Cafe Christmas Fudge Printable stamp set. I printed them out then used a die to cut the tag and scalloped backing. To finish off the box I added the tag to my die cut bow and tied them onto the boxes with twine. These boxes will be easy to mass produce so I can whip them out in no time at all. I guess I better put the fudge recipe items onto my grocery list so I can start my Christmas baking. I try to bake as much as I can in advance and put them in the freezer. Make sure to visit The Cutting Cafe blog on the 7th of November to see the rest of the Design Teams projects. Thanks for stopping by.

Tuesday, November 1, 2016

Paper Sweeties November 2016 Inspiration Challenge


Happy November, crafty friends! It's time for the November Paper Sweeties Inspiration Challenge. Here's the photo for this month's inspiration.


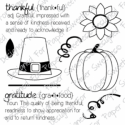
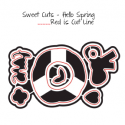
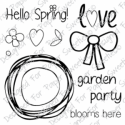
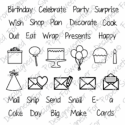
I used several elements from the challenge photo for my design. I started by taking a piece of gray paper and embossing it with lines to resemble the lines of the shutter then added a frame around it. I decided I wanted to add a wreath because there was one in the photo so I used the Hello Spring stamp set and coordinating Sweet Cuts. I stamped the wreath on a green polka dot paper I found in my scrap file then cut it out. I used the big bow from the set to hang the wreath from. Next I stamped and fussy cut a few leaves from the Planner Series Fall Sentiments on maroon and yellow papers and fussy cut them. I added a couple little vines to the wreath before adding the leaves (they came from the September release Thankful stamp set and Sweet Cuts). For my tiny chalkboard I used the stitched rectangle from the Sweet Cuts Window Elements. I cut one in black and one in brown then trimmed the black one at the stitching line before gluing them together. I white heat embossed my sentiment onto the chalkboard. I combined the words from two different stamp sets-Happy came from Planner Series Celebrate and Fall came from Happy Fall Y'all. I hope you'll have the chance to play along with this month's challenge. You can link your projects over on the Paper Sweeties Blog. Thanks for stopping by.