Tuesday, June 28, 2016

Finding Time For a Challenge


Life has been crazy hectic lately, it seems. But this morning I decided I had to sit down and make this card that just wouldn't get out of my head. On Sunday afternoon I made a quick pit-stop at Stampfest in Lakeland, FL. I was going to meet up with my friend and owner of Paper Sweeties, Debbie, and pick up my Design Team goodies for August. I met her last year at Stampfest and ended up joining her Design Team. She always has the booth next to Michele, from Pink & Main, so I had the chance to chat with her, too. Both of them are so much fun and their products are fabulous! At last year's Stampfest I purchased the On The Go stamp set from Pink & Main specifically for this darling little scooter. It's taken me a whole year to get this card on paper, but I love that it came out just as I envisioned it. I couldn't withstand the "peer" pressure when Debbie and Michele both bought the new Mini Misti stamping tool. I caved in and bought it, too. I've wanted it since they introduced it at CHA and knew it would be so much more convenient in my small space for designing and for our annual trek north to visit family. We all purchased them from the gals at the Right At Home booth. They were giving away a free 6x6 paper pad with the purchase and I picked the Doodlebug Spring Garden papers where I found this adorable pink scooter paper. I knew immediately that it was just perfect to finally make my scooter card with this darling Pink & Main stamp for their Summer Challenge they have going on this month.


What could be more Summerish than the abundant sunshine and breeze-blown palm trees we have in Florida. Mine were made from the Paper Sweeties On Island Time stamp set and Sweet Cut dies. I'm always wishing that my granddaughters could join me here and I know that my granddaughter Payton will love this little pink scooter card with the Wish You Were Here sentiment. I'm going to address it right now and stick it in the mail. Thanks for stopping by.


Sunday, June 19, 2016

The Cutting Cafe Celebrates America


Hello Friends! We're coming up on one of my favorite holidays, 4th of July. I love the celebration of our Independence. The picnics, parades and fireworks. This year hubby and I will be celebrating in the community with our friends and neighbors. This will be the first time we get to be a part of the community events. Usually we are up north with family, but we went earlier because our daughter got married. We are back home in Florida now and we sure did enjoy our time with family.  We were blessed to see all five of our children (though not in one place), ten of our eleven grandchildren and our one great granddaughter.

This week at The Cutting Cafe the Design Team is celebrating America with 4th of July projects. For my patriotic card I used the printable files Independence Day Background Set (background star paper) and the 4th of July Printable One set (the sentiment rectangle). My very favorite thing about Regina's Cutting Cafe printable files is how easy they make putting a quick card together. This was so easy to put together. I started with a white card stock A2 size card and added a red white and blue star printed paper. Next I printed up the red, blue and teal star background paper and trimmed it for my card front with a stitched rectangle die. Then I printed the sentiment piece and added leftover stars that I trimmed from the background paper. I added a piece of red, white and blue hemp to the star panel then topped it with the sentiment that had foam tape on the back to add a little dimension. That's it quick, easy and fabulous, if I might say so myself! I know you'll want to head to the Cutting Cafe Blog on Tuesday, June 21st to see more amazing projects from the Design Team and lots of ways to celebrate America's patriotic holiday.

Thursday, June 16, 2016

Paper Sweeties June 2016 Release Rewind


It's the last day of projects for this month's Paper Sweeties release I Love Summer. Today I wanted a patriotic look to go with the Stars & Stripes sentiment so I went with a red, white and blue color scheme. I used a banner from last month's Sweet Banners release and stamped the sentiment in navy blue. A little red, white and blue twine was the perfect embellishment. Quick, easy and All-American! You can head over to the Paper Sweeties Shop to get this month's Planner Series release Summer Sentiments, the I Love Summer Stamps and I Love Summer Sweet Cuts.

 Beth Luetschwager ---> WELCOME TO THE TEAM!
Debbie Marcinkiewicz – Paper Sweeties
Jeri Thomas 
Jinny Newlin - *June Guest Designer* 


Wednesday, June 15, 2016

Paper Sweeties June 2016 Release Party


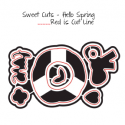
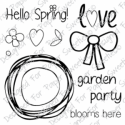
Yay! It's release day at Paper Sweeties. This month's release is called I Love Summer. There are images that are perfect for embellishing the wreath from last month's release including this sweet little birdhouse, nest and bird. For this design I grabbed an old paper stack that's been in my stash for quite some time. I know there are other's like me-paper hoarders. The papers are so pretty and vintage looking. So pretty that I just like to look at them. I'm sure you know what I'm saying. Anyway, I used a piece with the flowers scattered along the edges for my background. Then I found a coordinating flower print to cut the wreath from. The birdhouse is cut from a subtle beige gingham. I stamped and die cut the bird (from beige cardstock) and the nest (from kraft cardstock) using Momento Rich Cocoa ink. I added some dimensional foam to the back of the nest to pop it off the paper. I embellished the wreath with a pretty mauve bow and stamped the sentiment from the Hello Spring stamp set. Follow the links below to see more inspiration from the Design Team.

 Beth Luetschwager ---> WELCOME TO THE TEAM!
Debbie Marcinkiewicz – Paper Sweeties
Jeri Thomas 
Jinny Newlin - *June Guest Designer* 


Tuesday, June 14, 2016

Paper Sweeties June 2016 Sneak Peek


Welcome to the first day of projects celebrating this month's Paper Sweeties release I Love Summer. My inspiration for this card comes from the view I see every evening of the setting sun here in Florida. When I saw this sentiment in the new set I knew exactly what I wanted to do with my card-create a sunset. I cut a white cardstock panel and taped off a section to do my sunset inking. I used Distress Inks in Scattered Straw, Fossilized Amber and Carved Pumpkin. To make the little island for my palm trees I used a circle stencil and Black Soot ink. To get my palm trees I did a little "mirror" stamping. You stamp your image on the backside of another solid stamp and then stamp this image onto your paper, making it face the opposite direction. I removed my masking tape and added a piece of narrow washi at the top and the sentiment underneath then mounted the panel on an A2 black cardstock base. There's a list below of our other Designers so you can check out their Sneak Peek projects. Come back tomorrow as we celebrate Release Day with another project.

 Beth Luetschwager ---> WELCOME TO THE TEAM!
Debbie Marcinkiewicz – Paper Sweeties
Jeri Thomas 
Jinny Newlin - *June Guest Designer* 

Monday, June 13, 2016

Paper Sweeties Planner Series June Release``


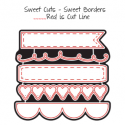
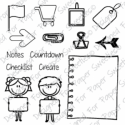
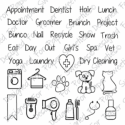
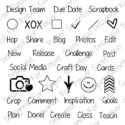
Hello Crafty Friends-It's time for this month's Paper Sweeties Planner Series post. This month's Planner Series Stamp Set is called Summer Sentiments. Combine this set with last month's Planner Series release Vacation and you've got the season covered. I don't always go to such lengths with my weekly planner spreads, but I couldn't resist making a playful beach scene with some of the darling images from these sets. I used several different Paper Sweeties stamps and Sweet Cuts to decorate my page and they are linked at the bottom of this post. I started by making some beach sand using the ground die from The Tree of Life. Then I needed some water waves so I used the Sweet Borders scallop and added some whitecaps to the waves with the Sweet Borders curly die. The next step was making all the little elements for the scene. I cut and Copic colored all the pieces. I used the Vacation set for the boats, anchor and life preserver. The starfish are made with the star from the Happy Icons set. The sandcastle and pail are made from the grocery cart in the Checklist set and I added a handle to the pail with a tiny piece from the curly border. The cute little kiddos from the Checklist set were the perfect size for my scene. I stamped their little signs with the words "Beach Fun" from the new release. Then, my favorite little element from the whole scene, the snorkel mask that I cut and put on the little boy. I cut the center from the goggles and added new eyes to the little guy with a black gel pen. Finally, I added all the cute elements to the beach and water. I love how this turned out and I hope you do, too. If you aren't a planner, you could use the stamps on a card or even on a scrapbook layout. I know you'll want to see what the rest of the Planner Team did with the new stamp set so I've added a linked list below. Make sure to come back tomorrow as I'll have a sneak peek of this month's Paper Sweeties regular release set.

Debbie Marcinkiewicz – Paper Sweeties
Jeri Thomas


Sunday, June 5, 2016

The Cutting Cafe Balloon Shaped Card


It's time for another Cutting Cafe Design Team post. This week it's an Anything Goes theme. I needed a birthday card for one of my grandson's. He is turning two this year. I decided to start with The Cutting Cafe Balloon Shaped card cut from black cardstock. Next I added some fun big polka dot paper and a couple of cute Lawn Fawn animals carrying the present and cake to the birthday party. I stamped the sentiment on a banner and added it to the top of the balloon and added a little yellow twine at the bottom of the balloon. Because this balloon is a little top-heavy it didn't want to stand up very well so I trimmed the back of the card bottom flat so it would stand up. Make sure you head over to The Cutting Cafe Blog for lots of amazing inspiration for lots of other Cutting Cafe files. Thanks for stopping by.
Wednesday, June 1, 2016

Paper Sweeties June Inspiration Challenge


WOW, June, how did that happen? I must admit, I've lost all sense of time. Hubby and I have been on the road for almost a month traveling around the country on our annual pilgrimage to see our children. We're at the tail end of the trip now. Home sweet home is on the horizon, none too soon for me. I miss our kids and grandkids terribly, but this traveling is getting harder and harder as we get older and older. It's been a joyous trip, though, as we've seen a daughter marry and met our eleventh grandchild for the first time. I surely can't complain how happy and proud we are of all of them.

Anyway, on to what you're really here for. It's time for a new Inspiration Challenge at Paper Sweeties. Here is this month's inspiration photo.


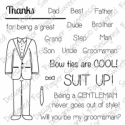
I just fell in love with the little ties on the cupcake and knew I wanted to use the little tie from last month's release Best Dad. Originally, I was going to make some cupcakes for the front of the card, but I created this while I'm on the road and brought very limited supplies with me. (If it was up to hubby, I wouldn't have any supplies with me. But, I need something to occupy me for the down time). I would have brought my Paper Sweeties Sending Sweet Thoughts stamp and die sets, if I'd thought of it, for the sweet little cupcake image. I did have the forethought to stamp the little ties before I left. Working with what I had with me I was able to cut four circles to add my shirt collars and ties to. I stamped the tie from best dad four times and fussy cut them. I also fussy cut the collars using small strips of white cardstock. I added a little hand doodling to each tie with a white gel pen. Once again, I was disappointed to realize I left my Best Dad stamp set at home so I couldn't stamp my sentiment from it. Instead you have a little sneak at a sentiment coming out in just a couple weeks in the June release that I know you're going to love. Thanks so much for stopping by. Here is the list of Paper Sweeties Designers so you can find more inspiration using this month's photo inspiration.