Tuesday, February 23, 2016

Plan with Me Monday


It's a rare week for me with very little going on after having the past two weeks crammed with obligations. I decided to do something a little different this week with my layout since I don't have very much to add. This past weekend was the beginning of the Tampa area Scrapbook Store Shop Hop so I was on the road traveling to four of the eight stores participating this year. I spent most of my budget at my favorite store Whim So Doodle in St. Petersburg. I used a few of my purchases on this page. I'll start with my square fill-ins where I used a Tim Holtz Mini Stencil and Distress Ink (Worn Lipstick) to stencil in my weekday squares. Next I added a strip of patterned paper to my sidebar and used two new stamp sets to fill it in-Illustrated Faith's Created To Create and Neat & Tangled Handstitched. Next I added some really pretty yellow and pink flowered washi tape. I found a weekend banner leftover from a previous layout in my stash so I added that and called it a day. I just wrote in the few calendar items for the week.

Saturday, February 20, 2016

The Cutting Cafe Sentiment Stems and Flower Tops


It's time for another Cutting Cafe post. This week the design team is creating projects using the Sentiment Stems and Flower Tops Printable Stamp Set. I paired my flower stem with another new file Assorted Card Folds Set 2. This is a tri-fold card with windows in it. My patterned papers are from American Crafts. I simply cut the card and layering pieces with my Cricut Explore and printed one of the flower tops to center in the window. A pretty orange bow and tag with a sentiment finished off this card. I know you'll want to see the projects from the rest of the Design Team so make sure you check The Cutting Cafe Blog where all the projects will be posted on Monday, February 21st.

Tuesday, February 16, 2016

Paper Sweeties February 2016 Release Rewind


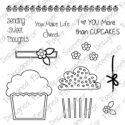
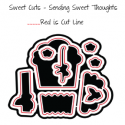
It's the last day of inspiration for this month's Paper Sweeties Release. Today I'm showcasing a card made with February's release called Thinking of You and the Thinking of Your Sweet Cuts (dies). The stamps include two different flowers, a leaf, a label and 18 different sentiment stamps that are mix and match. To make this clean and simple card I stamped the flower image in Archival ink colors of Hydrangea and Sky Blue. For the leaves I used Archival ink in Leaf Green. To fill in the small spaces I looked for a smaller flower on an older Paper Sweeties set and found just what I needed in the Sending Sweet Thoughts stamp set. After I finished stamping the flowers I die the label and added the sentiment for the Thinking of You set. I added a small flower/leaf stamp under the sentiment which also came from the Sending Sweet Thoughts stamp set. You can see the rest of the Design Team's creations by following the links below.

Debbie Marcinkiewicz – Paper Sweeties


Monday, February 15, 2016

Paper Sweeties February 2016 Release Party


Welcome! Today is the day for the Paper Sweeties February Release-Thinking of You-to go live in the shop! Yay! Love the 15th of the month. Today I've made an elegant card with touches of gold. I stamped the flowers with VersaMark ink and embossed them with gold embossing powder. Next I used the Sweet Cuts Thinking of You Sweet Cut dies to cut out the flowers and to cut some leaves from shiny gold cardstock. To assemble the card I used a white cardstock base and added a diagonally cut patterned paper from my stash. At the edge of the patterned paper I added a thin strip of glittery gold paper. Then I cut a piece of gold thread to place beneath my flowers in a messy bundle and attached it. On top of that I added my shiny gold leaves and vellum flowers. Oh, I almost forgot I used some Heidi Swapp Color Shine in gold to sprinkle a few droplets of gold on the white cardstock. You'll want to check out the rest of the Design Team's creations so I've add the list of links here to help you along. You can head to the Paper Sweeties shop here to purchase the new release. Thanks for stopping by and don't forget to come back tomorrow for one last day of inspiration using the new release.


Debbie Marcinkiewicz – Paper Sweeties

Sunday, February 14, 2016

Plan With Me Monday using Cardz TV Planner Basics and Brew Ha Ha Stamp sets


Hello friends! So glad you stopped by today for my Plan With Me Monday. This week I have a coffee theme and I used a free downloadable file from cutedaisy.com to make stickers for my boxes and side bar. As I've said before, this is my favorite way to decorate my planner you can't beat free.  I used two stamp sets from Cardz TV to complete my pages-Planner Basics and Brew Ha Ha. For items that I thought were a little more important I stamped in red ink, otherwise, I used brown ink. After I added my sticker paper to the desired boxes, I took the TO DO stamp, from Planner Basics and put it in the middle of top boxes and then added a heart check list sticker. On Wednesday I used the mailbox icon to denote expected mail and to remind me to put some cards in the mail for my grandkids. On my side bar I stamped the GROCERIES label to jot down anything I need from the store.

For Thursday I have a family birthday so I stamped some balloons in red ink. On Friday I stamped the APPOINTMENT stamp in red ink so I don't forget about a doctor appointment. I'm very excited for the weekend to get here because it's the start of a yearly Shop Hop in our area. This is an event put on by local scrapbook stores. There are eight stores participating. You visit each store and get a "passport" book stamped. When you visit all the stores and your book is completely stamped you're eligible for prize drawings. Each store also has free make and takes and gives you a 10% discount on any purchases you make. You have a week to visit each store. My friend and I usually do it in a couple days and it's a blast (except for the fact that it totally breaks the budget). Each year I've gotten better at keeping my spending under control.


In several of the boxes I filled in with stamped sentiments from the Brew Ha Ha stamp set. There are lots of fun coffee related stamps in this set. The stamp sentiments I used are "You MOCHA me happy!", "one of life's little PERK's", "the daily GRIND" and "BEAN missing you!". I enjoyed putting this spread together and hope you enjoyed seeing it.


Paper Sweeties February 2016 Release Countdown


Hello Friends, Happy Valentine's Day and welcome to day two of Paper Sweeties February 2016 Release Countdown. Since today is Valentine's Day I felt a strong urge to create a card in tune with the day. I used the beautiful Paper Sweeties With Love heart from last month's release and combined it with the cute little flowers from this month's Thinking of You release. I die cut a bunch of patterned paper flowers using the Thinking of You Sweet Cuts (dies) and arranged them around the inside of the heart. I did a little doodling on each flower with either a white or black gel pen to add a little interest. I started with a white card base and added a heart patterned paper from an older Recollections card stack. Over that, I added a piece of vellum to soften the look. Next I added the pretty flower festooned heart. As a final touch I added a pink ribbon bow. I'm so glad that you stopped by today and hope you'll visit the rest of the Design Team for more inspiration. Here is the list of Designers. Please click on their name to visit their blog.

Debbie Marcinkiewicz – Paper Sweeties

Saturday, February 13, 2016

Paper Sweeties February 2016 Release Sneak Peeks


Hello Paper Sweeties fans and welcome to the first day of inspiration from the Paper Sweeties Design Team for this month's release Thinking of You. This set includes two different flower stamps, a leaf stamp, a label stamp and 18 sentiments that can be mixed and matched. There are four dies in the coordinating Sweet Cuts.  I made a simple shaker card for today's project. I decided to be different and go with a square card today. I used the Thinking of You Sweet Cuts die to cut the shape from the front of the card. Next I did the same with two layers of fun foam and added them behind the cardstock front along with a piece of clear acetate. I prefer this fun foam technique for my shaker cards, rather than trimming dimensional foam to go around the shape. The fun foam gives it a more uniform look and prevents the card from getting ruined if you are going to mail it. I put some yellow and blue sequins from the Paper Sweeties Tutti Fruiti pack into the shaker. Lastly, I added the sentiment to the top of the shaker element. I put the stamps on my acrylic block and formed them to go around the curves of the opening. I hope you'll hop along and let the designers know how much you love their projects. The list is below for your convenience.

Debbie Marcinkiewicz – Paper Sweeties

Friday, February 12, 2016

Paper Sweeties Plan Your Life Series-February 2016


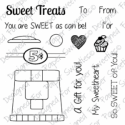
I'm so excited to share my February monthly spread with you today using Paper Sweeties products. This month's planner series release is the Celebrate stamp set. Let me remind you again that I'm using a MAMBI Happy Planner. I started by adding some red polka dot washi going down the sides of each page. The next step was making a banner to go across both pages made out of hearts. I used the heart die from the Snow Time Add-On Sweet Treats Sweet Cuts and cut 25 hearts from assorted patterned papers. I used my sewing machine to stitch them all together then swagged them across my pages. Next I made my gumball machine with the same Snow Time Add-On set and placed it in the left bottom corner. I used a bunch of different Paper Sweeties sets to fill in all my different activites. You can see them all linked at the bottom of the post. See that cute little envelope with the heart on February 2nd reminding me to mail my Valentine's cards out to my grandkids, that's from the new Celebrate set. I also used the balloon bunch from the set on the 28th to mark the date for a party we're going to for an old friend. On the February 14th box I used several stamps from the Get Your Craft On planner stamp set-the heart, the XOX and the arrow. One of my favorite little touches was using the balloon from the Happy Icons set to circle the date of the 18th which is my husband's birthday. A biggie this year, turning the big 60. I also used the stack of presents on this date. I'm having so much fun with my planner. It's great fun decorating it and it's keeping me way more organized. I hope I'm inspiring you to get organized too. You can see more inspiration from the Planner Series Design Team. Here are links to their blogs.

Debbie Marcinkiewicz – Paper Sweeties
Jeri Thomas


Tuesday, February 9, 2016

The Cutting Cafe Animal & Bug Love Clear Stamp Set


Hi there! Today I have another Cutting Cafe project to share with you using the new Animal & Bug Love clear stamp set. You can find this stamp set at the all new Cutting Cafe Shop, along with lots of other fun supplies for paper crafting including clear cardstock, patterned papers, ribbons and embellishments. I have a fun shaker tag I'm showcasing today that I made using the Fuse tool. I started with a piece of Tim Holtz watercolor paper in the 4.25 x 5.5" size that I cut in half. I did a little Distress Ink water coloring for a background using Mowed Lawn and Tumbled Glass then I stamped the Love Bugs image . Next I stamped the Love Bugs on white card stock and colored them in with colored pencils. I fussy cut them and added them to my water colored background. Then I made my holder for the tag. I used a clear stamp storage envelope from Avery Elle. I put the water colored piece into the envelope and fused the plastic together on three sides with my Fuse tool. I left the top open so I could add some sequins. I tossed in a few tiny heart and star flat sequins from Martha Stewart along with assorted pink sequins, some from Doodlebug and some from Pretty Pink Posh. After all my goodies were in I fused the top closed. To the outside of the tag I added a die cut HAPPY word and then tied on a tiny tag with the words Valentine's Day which came from one of the sentiments included with the clear stamp set. The last step to finish this tag off was adding an eyelet and some pretty pink ribbon.

Monday, February 8, 2016

Plan With Me Monday


It's another wonderful Monday. The sun is shining and the sky is blue though it is rather cool for Florida being only around 65. This has been the coolest and rainiest winter we've experienced in our time down here. It's fun to use the rainy days for designing and creating, that way I don't have to take time away from socializing with our winter friends. In a couple months a lot of our friends will head back north and then it will be very quiet here. Anyway, onto my weekly spread. I have to say I wasn't very happy with last week's spread, too much red. This week I decided to use a free download kit from My Planner Envy (myplannerenvy.com). I printed it out on sticker paper that I got from Staples. I think this is my favorite way to decorate since starting my planner. It's inexpensive and I love the results. This kit came with eight full size boxes, six half boxes, eight checklists, a weekend banner and a few odds and ends. I enjoy having some white space on my layouts to write in events and activities. You never know what will pop up during the week so you need a little extra space to write stuff in. The pennants at the bottom of the page are washi tape that I got from Michael's. I used the full boxes for the bottom row this week. I like to change up my layouts every week as far as where I put my checklists and full boxes. Variety is the spice of life right? I decided to use the half boxes for my meals for the week, except for Saturday and Sunday. I'm hoping hubby will take me out to eat for Valentine's day on one of the days so I left them blank. If it goes like most week's I'll end up cooking, but can't help a girl for hoping. Coming up this week is the new Paper Sweeties release starting on Friday where I'll be showcasing my February monthly spread using a new planner stamp set called Celebrations.  Hope to see you back here then.

Thursday, February 4, 2016

The Cutting Cafe Big Expressions HUG


Hello Friends-It's time for the 7th of the month Cutting Cafe project! Today the Design Team is creating projects using some of The Cutting Cafe Big Expression Printable and Cutting File sets. I've used (obviously) HUG. I've added a little something special to my HUG card, the darling elephant from the new Cutting Cafe Shop Clear Stamp Set Animal & Bug Love. Isn't he just adorable? I'm so smitten with how precious he is I want to use him on every card I make. I just can't help myself. I did a little paper piecing on him to give him a cute polka dot ear to match the lettering. This was so easy to put together. I just printed the Sentiment onto my paper, printed the separate letters on a coordinating patterned paper then glued them onto the printed sentiment. I stamped the elephant on another coordinating patterned paper and fussy cut him, then stamped his ear on the polka dot paper and cut it. I glued the ear in place and attached the elephant on top of the U. To finish off the card I attached a small hemp bow to the elephant's trunk and added a little doodling with a black gel pen. Make sure you check out The Cutting Cafe Blog on February 7th to see the rest of the Design Team Big Expression projects. Thanks for stopping by.

Monday, February 1, 2016

Plan With Me Monday


I'm completely shocked that we've already gone through the first month of the year and it's February. I just don't know where the time goes. So here I am with my first week of February planner spread. Since February is the month of Valentine's Day I decided to do the first two weeks with pink and red color schemes. I used papers from a Recollections paper stack to fill in my days and some fabulous Recollection washi tapes. I really love the banner washi at the top of the page. So cute! I made my weekend banner again this week using a heart punch and stamped in red using my Paper Sweeties Lower Alphas.


Here's a couple close ups of each page. I've got room on the left to write notes and a space to write down groceries I need. Clearly, I need to get to the grocery store. My cupboards are pretty bare so I haven't been able to write in what's for dinner each night. I've reached the point in life where I don't really enjoy having to cook dinner every night. How about you? I wish I had a private chef that could cook one meal for hubby and a different one for me. Hubby hates veggies and fruits and I could easily be vegan.


I had planned on showing my monthly spread today also, but have decided to save it for my post for the Paper Sweeties Plan Your Life Series on February 12th. See you back next Monday with my weekly spread for Valentine's week.
Thanks for coming by today.

Paper Sweeties February Inspiration Challenge


Hello Sweeties fans! It's the first of the month (WOW one month of the new year already gone) and that means it's time for the Paper Sweeties monthly Inspiration Challenge. Here is this month's inspiration photo.


Usually when I make my challenge project I try to stay very true to the photo. This month I thought outside the box a little and let the pink and white inspire my Valentine's Card. I started with a white card base and then used the With Love Sweet Cuts to cut the heart out of the center. Next I added a piece of pink cardstock to the inside of the card front to show through the heart. I knew I wanted to add a couple felt hearts to dangle from the center of the large heart. I didn't have any pinks that were the appropriate color so I had to go with red. I hand cut a couple hearts then added some hemp cord to each one, tied them together with a bow at the top and attached the bow with a glue dot. For my sentiment I used the Upper Case Alphas (which may be discontinued soon, so grab them from the shop before they are gone) and the heart stamp from the Sugar and Spice stamp set. I know you'll want to see the rest of the Design Team's projects so follow along with the list below. Thanks for stopping by today.

Debbie Marcinkiewicz – Paper Sweeties
February Guest Designer: Carrie Sheridan