Thursday, January 14, 2016

Paper Sweeties January 2016 Release Countdown


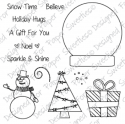
So glad you're back for day two of Paper Sweeties January 2016 Release Countdown! Today I'm showcasing the new Paper Sweeties Snow Time Add-on Sweet Treats and Snow Time Add-on Sweet Cuts. What a genius idea this set is-take the snow globe from Snow Time add the Sweet Treats stamps and die cuts and voila, a bubble gum machine. Love, love, love. I colored up the machine base with Copics, cut a few colorful gumballs, sandwiched them between the cardstock and a piece of acetate to give it the look of glass and added the price/handle. A simple zig-zag border I cut from the Sugar and Spice Sweet Cuts and the sentiment stamped in a nice bright red ink finish this card off. For more Design Team inspiration follow along on the list below. I look forward to you visiting tomorrow for Day Three of the Paper Sweeties January 2016 release.

Debbie Marcinkiewicz – Paper Sweeties

In case you missed Tuesday's post with the premier of Paper Sweeties Planner Series you can check out the Design Team's planner/calendar post by following the links below.

Debbie Marcinkiewicz – Paper Sweeties
Jeri Thomas

Wednesday, January 13, 2016

Paper Sweeties January 2016 Release Sneak Peeks


Hello my crafty friends. Welcome to the first day of Paper Sweeties January 2016 release sneak peeks. Today I'm featuring the Paper Sweeties With Love Stamps and Paper Sweeties With Love Sweet Cuts on an elegant wedding card. This card is 4 x 4" and features a white on white look. I dry embossed a fancy background then added Versamark ink around the edges and dipped them in gold embossing powder. Next I cut the With Love heart and added the gold embossing powder to the edges. I found some white flowers in my stash, layered them up and added some Frosting sequins to the centers. The gold embossed sentiment was the finishing touch. Now I know you'll want to see the rest of the Design Team projects, just follow the links below, then make sure you come back tomorrow for day two of sneaks.

Debbie Marcinkiewicz – Paper Sweeties
Jeri Thomas-*you are HERE*


If you missed yesterday's debut of the Planner Series stamp sets you can visit the planner designers at the links below.

Debbie Marcinkiewicz – Paper Sweeties
Jeri Thomas


Tuesday, January 12, 2016

Paper Sweeties Plan Your Life Series-January 2016


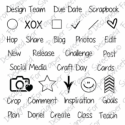
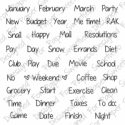
I'm so glad you've joined me today for the launch of the Paper Sweeties Plan Your Life Series. Today we are showcasing the Planner Series Get Your Craft On stamp set, the Planner Series Winter Sentiments and the Planner Series Happy Icons. Here is my weekly spread for this week using these stamps. The Get Your Craft On stamp set is just perfect for anyone on a Design Team. The icons and sentiments are just what you need to add your assignments to your calendar pages. This week I used the sentiments to add the Paper Sweeties January release assignments to my calendar. I also used the Paper Sweeties Alphas Upper and Lower case stamp sets to add times and activities to the calendar. Here is a closer look at the left-hand page. You can see how I used the little flower vase from the Happy Icons stamp set on the first section under Wednesday to denote a Memorial Service for a friend and then used the Upper and Lower case Alphas to caption it.


If you would like to start organizing your life and time but don't have a planner, Paper Sweeties can help you with that. Debbie has designed downloadable Planner Pages that you can print and add to a binder. They are in the Paper Sweeties shop now under the Planner Series tab. You can purchase the whole year's pages or one month at a time. Print them out add some pretty paper, washi tape or stickers and you're on your way. Finally, a way to use your papercrafting skills on something for yourself. Papercrafters tend to make stuff for all their family and friends, but never for themselves. Planners or personal calendars are the perfect way to indulge. 

I know you'll want to check out the other planner Designer's posts for more inspiration. Here are the links for you to use. Thanks so very much for stopping by today and don't forget to come back tomorrow for Day One of the Paper Sweeties January 2016 Release Sneak Peeks.

Jeri Thomas- You Are HERE


Monday, January 11, 2016

Plan With Me Monday-Planner Essentials


Hello crafties and welcome to my blog and the first post for my planner series. Today we're going to talk about how to get started and some supplies you might want to have on hand. Like any papercrafting project there are a zillion and one ways to go about this. Part of the fun is finding what works for you from planner to embellishments. Obviously, you will need a planner and I'm sure I don't have to tell you there are a plethora of sizes and styles. I'm using a MAMBI Happy Planner this year. What drew me to this planner was the moderate cost and the fact that it is a disc binding system so the pages can easily be removed for ease in embellishing. Another option is to get a download calendar file-two that I would suggest are The Planner Series 2016 Full Year Calendar from Paper Sweeties or the 2016 Planner Printable Set from The Cutting Cafe. The other goodies in my bag of supplies are Paper Sweeties Planner Series stamps, Pink & Main Planner stamps, Cardz TV planner stamps, assorted dye inks, Sharpie markers, washi tape, stickers, flag punches for weekend banners and postie notes. You can also find ready made stickers by the tons from many talented people on Etsy. It is my intention to show you different options weekly. One week it will be a layout with stamps, one week a printable download, a week with Etsy stickers and so on.

Here is a photo of my weekly planner pages for this past week. I decided to go with a winter theme, an odd choice for someone living in Florida, but I'm a transplant that originally came from Michigan. I'm happy to say I've left the cold and snow behind and I don't miss it in the least, but I most certainly have many cold weather memories.


I started this page spread with some free downloadable printable sticker elements from Jessica Brown @ MYPLANNERENVY.COM. I found this site to be a valuable source for freebies to decorate a planner, especially helpful for those just starting out. There are PDF files and files that can be cut with a Silhouette. I'm a little odd in that I enjoy fussy cutting, so that's what I do, and honestly I haven't had the time to sit down and mess with importing the files and cutting them with my machine. I printed this Pastel Winter Sampler twice on sticker paper that I bought at Staples. I will usually cut my elements out in the evenings while watching a favorite show on TV. After cutting out all the pieces I wanted to use I added washi tape to the pages then decided what patterned papers I wanted to stick in each section. I made a weekend banner using a flag punch from EK SUCCESS and Paper Sweeties Alpha stamps (upper case) and added a couple purple twine bows at each end of the banner. Keeping with the winter theme I decided to add a die cut snowman in the bottom corner. He came from the Paper Sweeties Snow Time Bundle.


A closer look at the weekend banner.


Please come back tomorrow for the premier post showcasing the new Paper Sweeties Planner Series January 2016 Release and my weekly calendar pages. Here's a little sneak peek. Happy planning!


Monday, January 4, 2016

The Cutting Cafe Valentine Project


I can hardly believe that I'm posting a Valentine's project already. In the blink of an eye Christmas is gone. You gotta move on quickly in the paper crafting world, right? Today is my bi-monthly post for The Cutting Cafe. This time around the Design Team is featuring Valentine projects. I'm using the Heart Treat Box Template and Cutting File.  I used the file to make a couple treats for my granddaughters for Valentine's Day. Since we are in different states I'm going to send them to my daughter and have her hang them on the girl's bedroom doorknobs for Valentine's Day as a special treat from Nana. These boxes were so easy to put together using the SVG files and my Cricut Explore Air. After I assembled them I added a few embellishments. I found the LOVE chipboard piece in my stash. It was a giveaway I won from Scrapbook and Cards Today a long time ago. I've been sorting through items as I organize my crafty goodies into there new home in my craft area. I separated the letters from the conversation bubble and used them in two different ways. The bubble got heat embossed in gold and the letters were sprinkled with glitter. I added small tags with words printed on them from the Valentine's Day Mini Word printable stamp set attached with a little baker's twine. I love how these turned out and I know "my" girls are going to love the surprise treats. Thanks for stopping by today and don't forget to visit The Cutting Cafe Blog to see the rest of the Design Team's inspiration.

Happy New Year & Introducing My Planner Series


Hello my crafty friends and followers and Happy New Year. I'm so excited to be starting a new year on my blog. I've got some new and exciting additions for the 2016 New Year. I'm always looking for fun and new ways to use my craft supplies. Like many of you, I occasionally decide to make a resolution or two. This year I have a couple goals. The first is to find ways to get myself more organized. One way will be by using a planner. Have you heard about the planner decorating craze. Go to Pinterest and search Planners/Organization and you'll see all kinds of great ideas. Each week on Monday I will have a Plan With Me blog post. I'll show you how I decorate my planner for the week. I have chosen a MAMBI Happy Planner for this endeavor. The main reason I chose this planner is A) Cost and B) the pages are easy to remove and decorate. Here are this week's calendar pages. Next week I'll go into more detail on my week's pages, but today's post is already too long.


My other goal is to finally get my craft supplies organized into my new storage unit. Some of you know a little background about my life style. For those of you that don't, hubby and I retired about six years ago. We spent a couple years traveling around the country in an RV, then we decided to buy a permanent Park Model RV in an Adult 55+ community in Florida.  We've been micro living happy as two little clams in a shell. Last year we decided to sell the camper up north and move to Florida permanently. Now we have taken the plunge and added a little more space to our home. From this construction we have room for my piano that has been stored at our daughter's for three years and room for an oak Amish built hutch cabinet. That cabinet is now going to be where I store my craft supplies. So I'll share a little of the process to get my supplies organized into it. Once things are in place I'm hoping to start making some craft videos. Here is a picture of the cabinet that will eventually hold all my craft supplies. Right now things are just sort of thrown in, but I have a plan that will slowly and surely take place.


I'll also be sharing some FUN new products that are coming out from The Cutting Cafe, Cardz TV stamps and Paper Sweeties. It's going to be a fun year! Thanks for stopping by!

Friday, January 1, 2016

Paper Sweeties January 2016 Inspiration Challenge #39


I can't think of a better way to start off the new year than with a challenge. I hope you'll join the Paper Sweeties Teamies for our January Inpiration Challenge #39 over on the Paper Sweeties Blog. This month's photo inspiration is this gorgeous palette and photo:


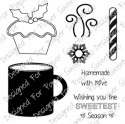
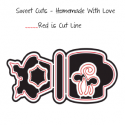
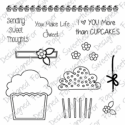
For my card I used the Paper Sweeties Homemade with Love Bundle and the Paper Sweeties Sending Sweet Thoughts Bundle. For my mug I heat embossed in white on dark brown paper. It doesn't show well in the photo, but this gave the mug a look of shiny glass. I added a heat embossed snowflake in the center of the mug and I did a little heat embossing on the cupcakes, too, then added some sparkling clear glitter to the frosting. The sentiment came from the Sweetie Pie Stamp Set. For a finishing touch to the "bendi" card (you can find these if you search on Pinterest) I added a few Frosting sequins. You can find the products linked below. Please follow along on the hop using the list below.