Monday, January 4, 2016

The Cutting Cafe Valentine Project


I can hardly believe that I'm posting a Valentine's project already. In the blink of an eye Christmas is gone. You gotta move on quickly in the paper crafting world, right? Today is my bi-monthly post for The Cutting Cafe. This time around the Design Team is featuring Valentine projects. I'm using the Heart Treat Box Template and Cutting File.  I used the file to make a couple treats for my granddaughters for Valentine's Day. Since we are in different states I'm going to send them to my daughter and have her hang them on the girl's bedroom doorknobs for Valentine's Day as a special treat from Nana. These boxes were so easy to put together using the SVG files and my Cricut Explore Air. After I assembled them I added a few embellishments. I found the LOVE chipboard piece in my stash. It was a giveaway I won from Scrapbook and Cards Today a long time ago. I've been sorting through items as I organize my crafty goodies into there new home in my craft area. I separated the letters from the conversation bubble and used them in two different ways. The bubble got heat embossed in gold and the letters were sprinkled with glitter. I added small tags with words printed on them from the Valentine's Day Mini Word printable stamp set attached with a little baker's twine. I love how these turned out and I know "my" girls are going to love the surprise treats. Thanks for stopping by today and don't forget to visit The Cutting Cafe Blog to see the rest of the Design Team's inspiration.

Happy New Year & Introducing My Planner Series


Hello my crafty friends and followers and Happy New Year. I'm so excited to be starting a new year on my blog. I've got some new and exciting additions for the 2016 New Year. I'm always looking for fun and new ways to use my craft supplies. Like many of you, I occasionally decide to make a resolution or two. This year I have a couple goals. The first is to find ways to get myself more organized. One way will be by using a planner. Have you heard about the planner decorating craze. Go to Pinterest and search Planners/Organization and you'll see all kinds of great ideas. Each week on Monday I will have a Plan With Me blog post. I'll show you how I decorate my planner for the week. I have chosen a MAMBI Happy Planner for this endeavor. The main reason I chose this planner is A) Cost and B) the pages are easy to remove and decorate. Here are this week's calendar pages. Next week I'll go into more detail on my week's pages, but today's post is already too long.


My other goal is to finally get my craft supplies organized into my new storage unit. Some of you know a little background about my life style. For those of you that don't, hubby and I retired about six years ago. We spent a couple years traveling around the country in an RV, then we decided to buy a permanent Park Model RV in an Adult 55+ community in Florida.  We've been micro living happy as two little clams in a shell. Last year we decided to sell the camper up north and move to Florida permanently. Now we have taken the plunge and added a little more space to our home. From this construction we have room for my piano that has been stored at our daughter's for three years and room for an oak Amish built hutch cabinet. That cabinet is now going to be where I store my craft supplies. So I'll share a little of the process to get my supplies organized into it. Once things are in place I'm hoping to start making some craft videos. Here is a picture of the cabinet that will eventually hold all my craft supplies. Right now things are just sort of thrown in, but I have a plan that will slowly and surely take place.


I'll also be sharing some FUN new products that are coming out from The Cutting Cafe, Cardz TV stamps and Paper Sweeties. It's going to be a fun year! Thanks for stopping by!

Friday, January 1, 2016

Paper Sweeties January 2016 Inspiration Challenge #39


I can't think of a better way to start off the new year than with a challenge. I hope you'll join the Paper Sweeties Teamies for our January Inpiration Challenge #39 over on the Paper Sweeties Blog. This month's photo inspiration is this gorgeous palette and photo:


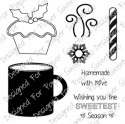
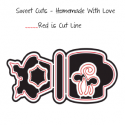
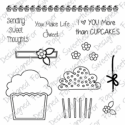
For my card I used the Paper Sweeties Homemade with Love Bundle and the Paper Sweeties Sending Sweet Thoughts Bundle. For my mug I heat embossed in white on dark brown paper. It doesn't show well in the photo, but this gave the mug a look of shiny glass. I added a heat embossed snowflake in the center of the mug and I did a little heat embossing on the cupcakes, too, then added some sparkling clear glitter to the frosting. The sentiment came from the Sweetie Pie Stamp Set. For a finishing touch to the "bendi" card (you can find these if you search on Pinterest) I added a few Frosting sequins. You can find the products linked below. Please follow along on the hop using the list below.


Friday, December 18, 2015

The Cutting Cafe Bendi - Bendy Card


It's Design Team project time at The Cutting Cafe Blog. It's a free week for the DT and I decided to use Regina's new Bendi-Bendy card template for my project. Have you heard of Bendy cards? I hadn't, until Regina sent the file out to the Team. I fell in love with it immediately. It's always fun to find new ways to make a standard A2 size card. This card folds flat for mailing but becomes three dimensional when assembled. I also used several other Cutting Cafe files to decorate my Bendy card. The Christmas Tree with Presents Shaped card, the Christmas Tree Trio Shaped card, and Christmas Card Banners. I started this card by using the SVG Bendy Card file and my Cricut Explore Air to cut it wirelessly. (Something else I'm in love with, my new Cricut Explore Air). After I had the base of the card and the mats cut, I took the large mat on the back (tallest) section of the card and ran it through my printer to get the colored star banner on it. I was so glad I thought about doing this because I think it's perfect behind the trees. On the middle section of the card I used the medium size tree from the Christmas Tree Trio shaped cards. I printed it, fussy cut it, then ran it through my Cuttlebug with a Darice Dots embossing folder and added some doodling with my white gel pen around some of the dots. On the front panel of the card I used the smallest Christmas tree from the Christmas Tree Trio shaped card and ran it through the Cuttlebug Spots and Dots folder and added more doodling with my white gel pen. Next I printed the presents from the Christmas Tree with Presents shaped card on kraft cardstock and red cardstock. I assembled the presents and bows, inking the edges of the presents and adding some white gel pen accents on the bows and spread them around the tree. You're definitely going to want to get this Bendy card file for yourself. I promise you're going to love it as much as I do. Don't forget to stop by The Cutting Cafe Blog to see the rest of the inspiring designs from the TEAM. This is my last post of the year. I want to take this opportunity to wish you all a wonderful holiday season and blessings for the New Year. I appreciate you all and thank you for visiting my blog. I'm looking forward to the New Year and bringing you more inspiration.

Wednesday, December 16, 2015

Cardz TV Stamps Merry Everything Tags


I'm so excited to share my fun tags with you today. I whipped these up using my brand new FUSE tool for my Cardz TV Gallery post today.  I purchased it a couple months ago from Amazon with a gift card my daughter gave me for my birthday. With Christmas only ten days away it was the perfect time to make these shaker tags that I've been wanting to try. I started with a piece of 4.25 x 5.5 inch Tim Holtz Distress Watercolor cardstock and cut it in half. On one I did a quick color wash of Festive Berries Distress ink and on the other I used Cracked Pistachio Distress ink.  While they dried I prepared my die cuts and heat embossed my sentiments. The Merry die cut came from My Creative Time. I cut one in red and the other from shiny gold cardstock. Then I die cut the deer (also from My Creative Time). Next I stamped the EVERYTHING sentiment on fish tail banners. One was stamped with Versamark ink and sprinkled with WOW Gold Glitter embossing powder, the other with Versafine Onyx Black ink and sprinkled with Ranger Fine Embossing powder in Clear then I heated them up with my heat gun. I colored my Santa image from Pink & Main Jolly Holidays stamp set. I will be entering this tag in the Pink & Main Challenge #4 for Christmas.


Now it was time to bring out the FUSE tool. I have to tell you that it took a bit of practice to get the lines fused properly. My first try was not the best and I threw it away, but the next came out fine after I got the hang of placing the tool correctly in the slit on the ruler that comes with it. I fused three sides of each tag and then filled the pouches with lots of bits and bobs. Some sequins from Pretty Pink Posh, microbeads and iridescent stars from Martha Stewart and a few miscellaneous sequins I found in my stash including stars and snowflakes. After filling the two pouches I fused the tags shut on the top and added eyelets to each one. On the gold tag I added Lawn Fawn Gold Sparkle Cord and on the Santa tag I added red and white twine. To complete the tags I added the die cuts, stamped image and sentiment banners to the front. You can find the Merry Everything Stamp set HERE.


Sunday, December 13, 2015

Paper Sweeties December Release-The Twelve Days of Christmas


This month's release at Paper Sweeties is going to be a twelve day celebration with each Design Team Member taking a day to show you four different projects. You are going to want to join us each day to see some amazing and incredible design projects using this month's release products. Here is the the list showing each Design Team member's day:

December 3rd:  Maria Patrick
December 4th:  Nancy Penir
December 5th:  Kathy Schweinfurth
December 6th:  Mackie Robertson
December 7th:  Jill Norwood
December 8th:  Michelle Bala
December 9th:  Michele Henderson
December 10th:  Larissa Heskett
December 11th:  Jeri Thomas
December 12th:  Angel Johns
December 13th:  Mynnette Kitchen

Friday, December 11, 2015

Paper Sweeties December Release


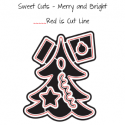
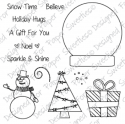
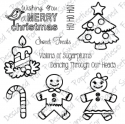
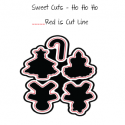
So glad you're joining me today for the Paper Sweeties Twelve Days of Christmas Designers' Blog Hop. I have lots to show today so sit back and relax with a beverage of choice as I show you my projects made with the newest Paper Sweeties stamp and dies. First I'll show you pictures of the new sets and I'll follow them up with four projects showing different ways to use each set. If you missed any of the Teams previous projects I have the list at the end of my post. This month's release features the Merry and Bright Stamps and Sweet Cuts along with the Sugar and Spice Stamps and Sweet Cuts as pictured below.

Merry and Bright Sweet Cuts

Merry and Bright Stamps


Sugar and Spice Stamps

For my first project I'm showcasing some fun tags using the Sugar and Spice sets.


I started these tags by cutting the Gingerbread Sweet Cuts from kraft color corrugated cardstock and plain white cardstock and glued them together for a little more stability. Next I inked over the top of the corrugated layer with Versamark ink and sprinkled them with WOW Opaque Bright White embossing powder then heated them up with my heat gun. While they were still hot I added some clear glitter. To embellish the tags I added Paper Sweeties Baker's twine in Strawberry and Paper Sweeties Mistletoe sequins. Then I stamped the sentiment on the back from the Paper Sweeties Ho Ho Ho Bundle.

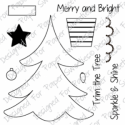
My next projects are two cards using the Christmas Tree Tag Sweet Cuts. I made a fancy version and a homespun version. You can see how just changing up the paper I used gave them two completely different looks. First I have a homespun look to the first tree card. I used papers from last year's Recollections Holly Day Wishes 6x6 paper stack and cut each piece for the tree from a patterned paper. I added the tree scalloped trim in red, the star in beige and finished it off with a few Paper Sweeties sequins.


For the fancy card I used another Recollections paper pad. This one is produced this year and it's called Winter Frost. Love, love, love these papers with the pretty aqua blue, crisp white and touches of silver foil. I cut the background from foiled pattern paper as well as the tree. For the scalloped trimming on this tree I cut it from white cardstock and then used the coordinating stamp to heat emboss with WOW Platinum Sparkle Embossing Glitter. I also used the same glittery embossing powder on the tree's star. The sentiment is stamped on a fish tail cut banner using the same embossing powder and I went around the edges of the banner with Versamark ink and sparkled them up, too. Interestingly, the ornaments on the tree were die cut using the bulb die cut from the set. This paper stack had a pretty snowflake patterned paper and the flakes were the exact size of the bulb die. Perfect! Sometimes the paper can do all the work for you.


Next I have two gingerbread ornaments made from die cut felt. I used a blanket stitch to attach two layers of felt and before stitching them closed I added a couple cotton balls for stuffing. Then I glued on the facial features and rick rack trim, added a bow tie on the gentleman and a bow on the ladies head. I also gave her a little skirt simply made by using a gathering stitch on a piece of red gingham ribbon.


For my last project of the day I have a home decor project made with a shadow box from Target's dollar bin. I used both New Release sets to put my little scene together, along with the older Paper Sweeties Ho Ho Ho Bundle for the Ginger kids, and the older Snow Time Bundle for the presents under the tree. This time I stamped the gingerbread features with Versamark ink and heat embossed them. Mom got a hair bow and a skirt of red gingham ribbon. I made all of the elements by stacking five layers of each die cut and glueing them together to give them more dimension. I made the sentiment plaque using the die cut from the Paper Sweeties Tree of Life Bundle. It's actually the die cut for the ground in that set, but I always like to look for ways to use my die cuts in a different way. To finish off my shadow box decor piece I added a big red burlap bow to the top.


I hope I've given you some great ideas for ways to use the new release Sugar and Spice Bundle and the Merry and Bright Bundle. Thanks so much for sharing your time with me today. I wish you all a blessed holiday season.

Here's is the blog hop list in case you've missed any of the Twelve Day hop.


December 3rd:  Maria Patrick
December 4th:  Nancy Penir
December 5th:  Kathy Schweinfurth
December 6th:  Mackie Robertson
December 7th:  Jill Norwood
December 8th:  Michelle Bala
December 9th:  Michele Henderson
December 10th:  Larissa Heskett
December 11th:  Jeri Thomas
December 12th:  Angel Johns
December 13th:  Mynnette Kitchen